Raspberry Pi and Google Cloud IoT provide a variety of opportunities for rapid prototyping. While Raspberry Pi is a powerful prototyping board on its own, cloud connectivity allows for porting embedded solutions to other boards and IoT devices.
This guide will help you get into prototyping with Raspberry Pi and Google Cloud IoT. You’ll learn how to create a Google Cloud account, get access to the necessary APIs, connect your Raspberry Pi to Google Cloud IoT, run a simple Python script, and check if data gets to the cloud and back correctly.
We created a short demo that, at the press of a button, sends telemetry data consisting of a message, LED states, and the time to Google Cloud. By changing device state data in Google Cloud, we can turn on and off two LEDs connected to the Raspberry Pi.
If you have previous experience working with Raspberry Pi, this entire tutorial should take less than an hour.

Step #1: Create a Google Cloud account
First of all, you need to create a Google Cloud account. Google offers a free trial in the form of $300 that you can spend over the next 12 months. You won’t need to spend money on our tutorial, though. So head over to Google Cloud and click Get started for free.
Going through the two-step registration should automatically take you to the Console. If it doesn’t, click on the Console button in the top right corner of your screen.
The next step is to enable IoT Core and create a registry for your device. Go to the navigation menu in the top left corner of your screen and find IoT Core (or find it through the search bar). Enabling IoT Core should take you to your Registries. If it doesn’t, you can find Registries through the search bar.

On the Registries page, click Create registry and choose your region and desired ID. You’ll have the option to select the protocols necessary for your project. While our tutorial only uses MQTT, you can leave HTTP enabled if you want to.
Under Default telemetry topic, select Create a topic. Then enter a name for it and hit Create (your choice of encryption doesn’t matter). The topic you create will store telemetry and state data from your device.
In the Device state topic section, select the topic you’ve just created. You don’t need to make any changes to Stackdriver Logging for this tutorial, so leave it as is.

Now click Create at the bottom of the page to finish creating your registry. This action will take you to the IoT Core main page.
At this point, you should have a Google Cloud account with IoT Core enabled. You should also have your first device registry. If you would like a more in-depth tutorial on setting up your Google Cloud account, take a look at this Quickstart guide from Google.
Step #2: Set up and configure Raspberry Pi
You’ve probably heard of “Hello, world!” Usually, it’s the first piece of code you write to try out a new programming language or framework.
Embedded engineers have their own “Hello, world!” — blinking an LED on a new microcontroller. For this tutorial, we’ve prepared a Python script that allows you to blink LEDs through the cloud with a push of a button and receive JSON status updates from your Raspberry Pi.
Note: In theory, this tutorial should work for any Raspberry Pi. We have tried it on Raspberry Pi Zero, Raspberry Pi 2 Model B, and Raspberry Pi 3 Model B and can confirm that you can run our script on these boards.
To get started, you first need to install a Raspberry Pi operating system (OS) image on an SD card. For a quicker start, we recommend using an OS with a desktop. Here’s an official tutorial from Raspberry Pi to help you.
After installing the OS, you can boot the Raspberry Pi. Insert the SD card into the card reader, plug the mouse and keyboard into the USB ports, and connect your monitor with an HDMI cable.
Then plug in the power supply cable and the Raspberry Pi will start booting. The process should be pretty straightforward, but if you have any issues, check out the official tutorial from the Raspberry Pi Foundation.
Note: You will need the internet for our tutorial, so don’t forget to connect to Wi-Fi or use an Ethernet cable.
Now, let’s make sure that the operating system is up to date and that you have all the necessary tools to run our Python script:
1. Update and upgrade the OS packages:
sudo apt-get update && sudo apt-get upgrade2. Download and install git:
sudo apt-get install git3. Download and install pip3:
sudo apt-get install python3-pip 4. Download our script from GitHub:
git clone https://github.com/Ivan-koz/GC-IoT_Python_example.git5. When the download completes, go to the example folder:
cd GC-IoT_Python_example/example6. Install a virtual environment for Python:
sudo pip3 install --upgrade virtualenv7. Create and run the virtual environment:
virtualenv env && source env/bin/activate8. Install the necessary packages:
pip3 install -r requirements.txt
openssl genpkey -algorithm RSA -out rsa_private.pem -pkeyopt rsa_keygen_bits:2048 && openssl rsa -in rsa_private.pem -pubout -out rsa_public.pem10. Download a Google CA root certificate:
wget https://pki.goog/roots.pem
At this point, you will need to go back to your registries in the Google Cloud Console and create your first device. Enter the device name and, in the Public key field, enter the data generated from rsa_public.pem.
Note: To view data in rsa_public.pem, execute cat rsa_public.pem in your Raspberry Pi terminal.
Click Create, and your device will be connected to the Google Cloud IoT.
Step #3: Blink an LED through Google Cloud IoT
First, you need to assemble the IoT device. Here are the components we used when building our device, but feel free to make appropriate substitutions:
- Raspberry Pi 3 Model B
- Digilent 240-131 Breadboard
- LEDs (1 green and 1 red)
- 510 ohm resistors (x2)
- Button
- 10k ohm resistor
- Jumper wires
Once you have the hardware, start assembling the device:
- 3.3 V power from physical pin 1
- Ground from physical pin 6
- Red LED anode to physical pin 12 (BCM 18) and cathode to the ground line via a 510 ohm resistor
- Green LED anode to physical pin 11 (BCM 17) and cathode to the ground line via a 510 ohm resistor
- The button to the physical pin 40 (BCM 21) and the 3.3 V line (one leg via a 10k ohm resistor and the other to the ground line)

Make sure that the parameters in example.py match your GCP settings. Use any text editor and run the following command:
sudo nano example.py
You need to enter the project_id (you can find it in the Google Cloud Console), registry_id (the name of your registry, which you can find in the IoT Core tab), device_id (the name of your device, which you can find in IoT Core), and cloud_region (the location of your project, which you can also find in IoT Core). You can leave the rest of the parameters as they are.
If you’ve been working in nano, press Ctrl+O to save changes and Enter to confirm them. Then press Ctrl+X to exit nano.
Now you can run your script:
python3 example.pyIf you entered the parameters correctly, you should now see the following message:
Creating JWT using RS256 from private key file rsa_private.pem

Connection Result: 0: No error.vim example

Subscribed:  (1,)
Try pressing the button on the device while running the script. You should see the following message:
Publishing payload {

    "num_message": 1, # the incremented value of button presses

    "led1": false, # current state of the red LED (false = OFF, true = ON)

    "led2": false, # current state of the green LED (false = OFF, true = ON)

    "message": "Hello", # constant message

    "time": "2019-08-20 13:12:47" # UTC timestamp when the button was pressed

}

Published message acked.
Step #4: Exchange device data with Google Cloud
To read data received from Google Cloud, you need to pull messages from the pub/sub subscription. You can find the pub/sub subscription through the search bar by typing in “pub/sub” and going to the Pub/Sub topic.

Select the subscriptions tab and click create subscription. In the ID field, enter a name for your subscription, enter a topic name in the projects/<project-id>/topics/<topic-name> format, and keep the delivery type as Pull. At this point, the other settings don’t matter, so go ahead and click Create.
Next, you can either use the Cloud Shell API or download the Cloud SDK. After logging into the SDK Shell, run the following:
gcloud pubsub subscriptions pull <subscription-name> --auto-ack --limit=10As a result, you should see a table with telemetry data sent from your Raspberry Pi:

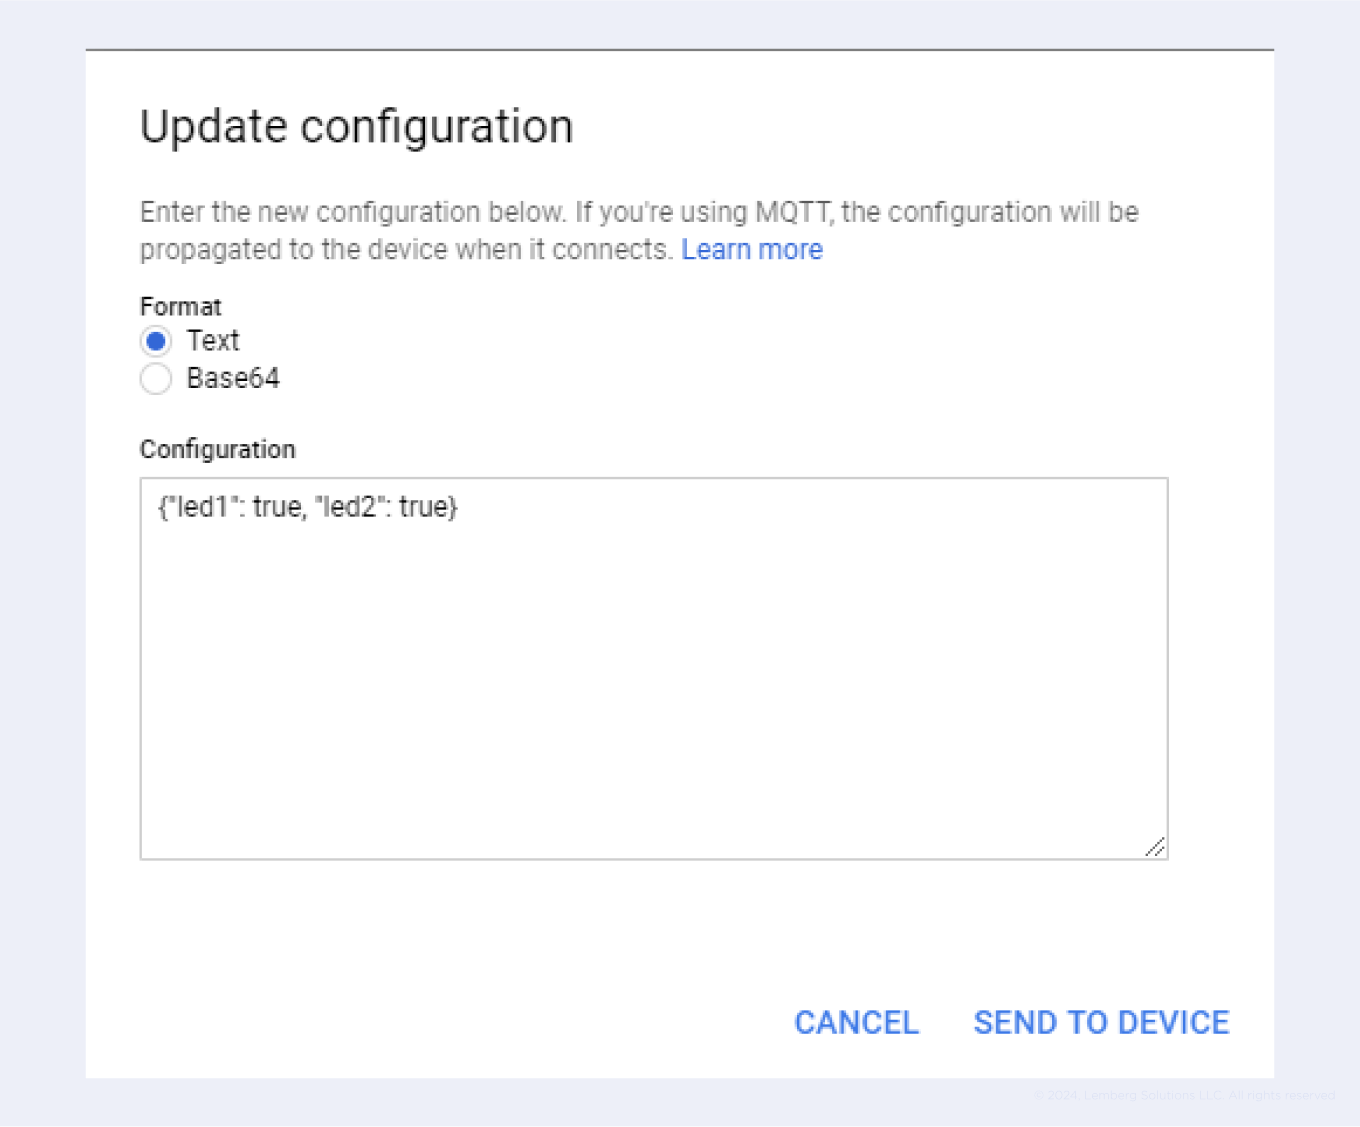
To send data to the device, go to IoT Core and then to the Devices tab. Select your device there and click Update Config. Now enter {"led1": true, "led2": true} and click Send to device.
If the device is connected, you should see both LEDs light up. By changing the parameters in the config, you can turn the LEDs on and off (in our case, LED1 is red and LED2 is green).
Summary
Raspberry Pi and Google Cloud IoT are a great toolset for rapid hardware prototyping. A great way to get started with these technologies is to blink a couple of LEDs — the embedded equivalent of “Hello, world!” It should take you about an hour to go through these four steps:
- Create a free Google Cloud account
- Configure a Raspberry Pi and connect it to Google Cloud
- Assemble your Raspberry Pi IoT device and run the Python script we’ve shared
- Make sure data goes to Google Cloud and back correctly
At this point, you should be in Google Cloud. What’s next is entirely up to you — for instance, you can connect a couple of sensors, collect data, sent it to the cloud, and analyze it there.
If you want, try going the complete opposite direction from the cloud and make something on the edge like a LoRaWAN Mesh.

Prototype cloud-based IoT hardware with Lemberg Solutions
What we’ve shown here is a preview of the expertise of our embedded engineering team at Lemberg. To see more, take a look at our IoT case studies.
If you have an IoT project in mind that needs some dedicated help, make sure to write a quick message to Slavic Voitovych, our Business Development Manager. Slavic knows everything about IoT at Lemberg and is always ready to share his knowledge.