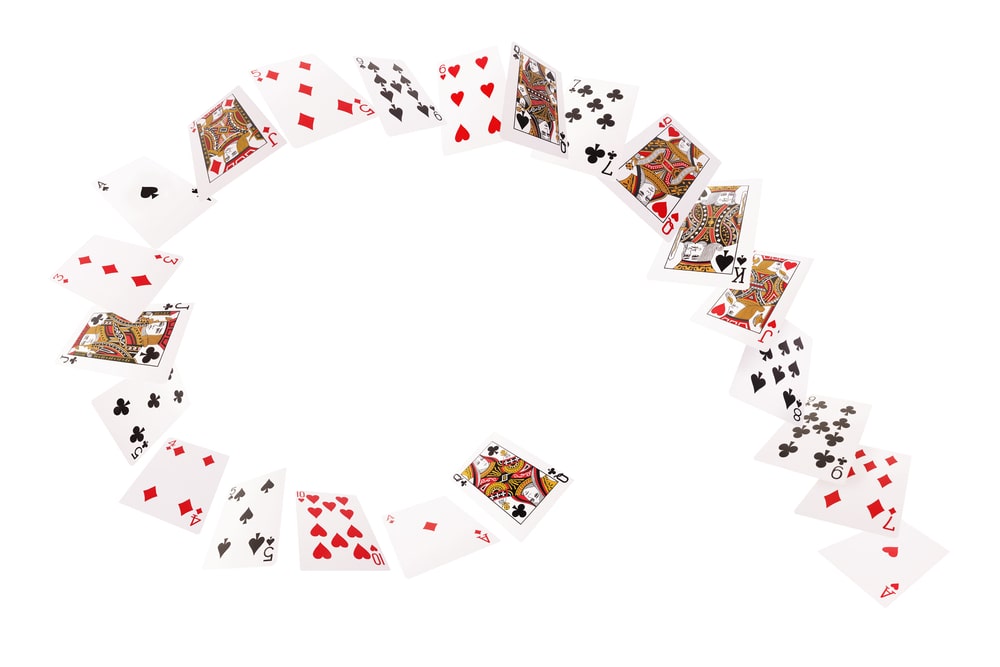
When you are performing a good "card trick" all the details and complexity should be invisible to the observer. Magic should appear smooth and natural! Today we'll take a look behind the scenes. Enter Live Stream.
Most of the social media supports live streaming. Such as Youtube, Facebook, Snapchat, Instagram... LIVE mode is a common thing nowadays. If your product isn't Live, add it in Todo list!
Live Stream (Broadcast) is not peer-to-peer data flow model. It`s a more complex solution. That's what we’re gonna talk about. Backstage. Let's walk through classified “LIVE”.
How to stream live?
There are the 3 stages that build up the Stream: Capture, Encode and Go Live. Now more about each of them.
- Capture - on this stage we capture input stream as a raw data. It could be a file or another stream used as a source.
- Encode - preparing and formatting the input stream. Encode to RBG/HSV pixel format to be able to analyze and edit each frame. Compress output via codec to improve productivity and decrease latency.
- Go Live - create shared stream endpoint with multi-connection support.
Check also our other articles about machine learning 'Getting Started with Activity Tracking App. Data Collection for Machine Learning Algorithm' and 'Motion Gesture Detection Using Tensorflow on Android'.
Capture

FFMPEG / OPENCV capture
So what's cooking? How do you create a successful point and handle the first stream frame? The main tool for that is FFmpeg lib. FFmpeg is a free software project that produces libraries and programs for handling multimedia data. No matter what source you are going to utilize with FFmpeg (screen, camera, file) - you can even set it up with a command line:
Mac OS. AVFoundation media device list
ffmpeg -f avfoundation -list_devices true -i ""
… capture screen device.
Mac OS. AVFoundation screen device
ffmpeg -f avfoundation -i "1" -pix_fmt yuv420p -r 25 -t 5 /Users/UserName/Downloads/out.mov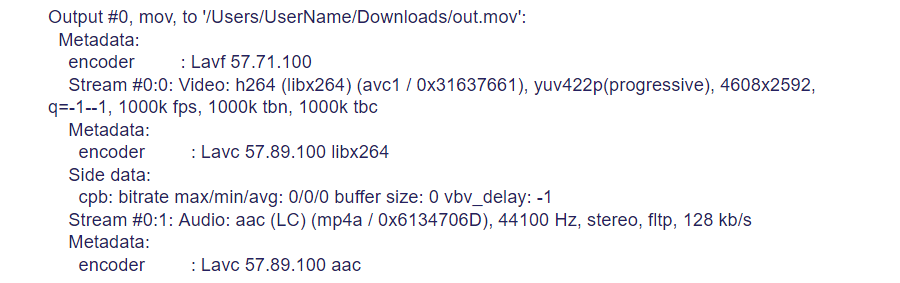
Based on ffmpeg, openCV lib uses the same principles to handle the stream source:
const std::string url = “http://192.168.3.25:1935/live/myStream/	playlist.m3u8";

cv::VideoCapture capture(url);

if (!capture->isOpened()) {
    //Error
}

cv::namedWindow("Stream", CV_WINDOW_AUTOSIZE);

cv::Mat frame;

while(stream_enable) {
    if (!capture->read(frame)) {
        //Error
    }
    cv::imshow("Stream", frame);

    cv::waitKey(30);
}
As a result we see a window with current stream capture.
cv::Mat frame - current frame object. cv::Mat object - represents 2D pixel matrix with HSV or BGR pixel format. Rows and column represent pixel matrix which are an intermediate format in the streaming process.
See how Lemberg might help you leverage data science at your project.
Video analysis
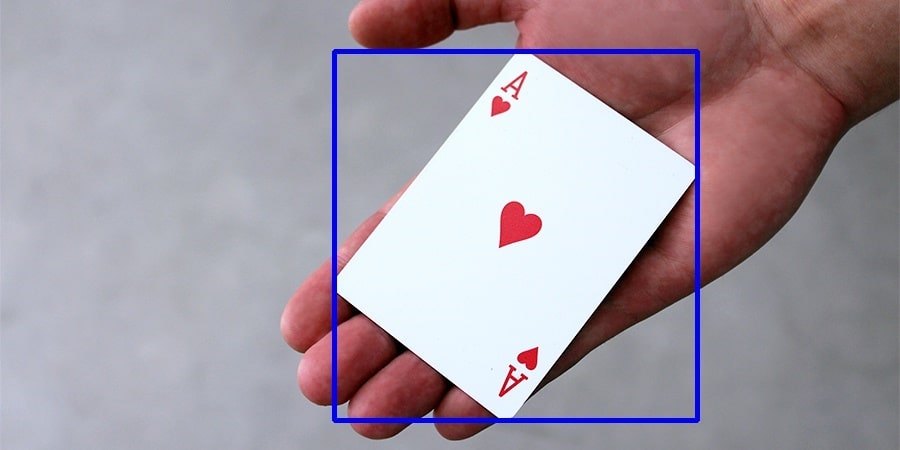
OpenCV - Originally developed by Intel's research center, as for me, it is the greatest leap within computer vision and media data analysis. The main thing to note about OpenCV is the high performance analysis using 2d pixel matrix. Over 30 frames per second with top quality makes around 30 millions pixel per second. You must be thinking to yourself “That’s a high load, isn't” ? It means that the analysis should be very fast to keep your CPU running. Using multi core process and low level optimization gives way to a super fast library analysis. Definitely is a tool kit with lot of algorithms. OpenCV is a main tool in Artificial intelligence when we are talking about media content. What can we analyze? - Well, basically in general anything that can be 2d matrix. Let's take a look at simple code to detect the card in the frame.
Object tracking
Threshold
An example of a playing card by reduction to the maximum contrast. In one word - THRESHOLD. This method provides black and white zone which describes object’s area.

Threshold method takes input and output frames, thresh value, and thresh strategy as a parameters.
int threshold_value = 160;
int max_BINARY_value = 255;
threshold(inFrame, outFrame, threshold_value, max_BINARY_value, THRESH_BINARY);
Threshold provides the most satisfactory result in case there’s a high contrast in an image. Also we could try to detect edges to describe the object in the frame. Canny - Edge Detector. Detects edges between most colours that differ and or contrast values.
 /// Detect edges using canny
Canny( inFrame, cannyOut, threshold_value, max_BINARY_value, THRESH_TOZERO );
Playing of a couple of methods we can detect contour.
vector  > contours;
vector hierarchy;

findContours(cannyOut, contours, hierarchy, RETR_TREE, CHAIN_APPROX_SIMPLE, Point(0, 0));
Contours - Array of contour detected in the frame. Comparison, measurement and we’re getting closer to our target.

int threshholdValue = 200;

int main()
{
    const std::string url = "/Users/maxvitruk/Documents/Press/video/trailer_1.mp4";

    VideoCapture cap(url);
    if (!cap.isOpened())
    {
        cout << "Failed to open camera" << endl;
        return 1;
    }

    double width = cap.get(CV_CAP_PROP_FRAME_WIDTH);
    double height = cap.get(CV_CAP_PROP_FRAME_HEIGHT);

    namedWindow("Original", CV_WINDOW_AUTOSIZE);
    namedWindow("Thresh", CV_WINDOW_AUTOSIZE);


    VideoWriter video("/Users/maxvitruk/Downloads/out.avi",CV_FOURCC('M','J','P','G'),10, Size(width,height),true);

    bool readCamera = false;

    while (!readCamera)
    {
        Mat frame;

        bool success = cap.read(frame);

        if (!success)
        {
            cout << "Failed to read frame" << endl;
            break;
        }

        Mat detectedFrame = frame.clone();
        Mat thresh = frame.clone();

        cvtColor(thresh, thresh, COLOR_BGR2GRAY);
        GaussianBlur(thresh, thresh, Size(1, 1), 100);
        threshold(thresh, thresh, threshholdValue, 255, THRESH_BINARY);

        vector  > contours;
        vector hierarchy;
        findContours(thresh, contours, hierarchy, RETR_TREE, CHAIN_APPROX_SIMPLE, Point(0, 0));

        vector > approx(contours.size());
        vector boundRects(contours.size());

        for (size_t cIndex = 0; cIndex < contours.size(); ++cIndex)
        {
            vector contour = contours[cIndex];
        	double perimeter = arcLength(contour, true);

        	if (perimeter > 500.0 && hierarchy[cIndex][3] == -1){

        	    approxPolyDP(Mat(contour), approx[cIndex], 0.001 * perimeter, true);
                boundRects[cIndex] = boundingRect(Mat(approx[cIndex]));

                rectangle(detectedFrame, boundRects[cIndex].tl(), boundRects[cIndex].br(), rectColor, 4, 8, 0);
        	}
        }

        imshow("Original", detectedFrame);
        imshow("Thresh", thresh);

        video.write(detectedFrame);

        int key = waitKey(30);

        switch (key){
            case 27:
                readCamera = true;
            break;
        }
    }

    destroyWindow("Test");

	return 0;
}
Card detection from a contour
Step 1. Read the video file
VideoCapture cap(url);Step 2.
- Reduce the colour to black and white
- Blur the frame to approximate edges
- Reduce the contrast
cvtColor(thresh, thresh, COLOR_BGR2GRAY);
GaussianBlur(thresh, thresh, Size(1, 1), 100);
threshold(thresh, thresh, threshholdValue, 255, THRESH_BINARY);
Step 3. Find contours
findContours(thresh, contours, hierarchy, RETR_TREE, CHAIN_APPROX_SIMPLE, Point(0, 0));Step 4. Measurement of the perimeter
double perimeter = arcLength(contour, true);Face detection
CascadeClassifier
“WIKI: Cascading is a particular case of ensemble learning based on the concatenation of several Classifiers, using all information collected from the output from a given classifier as additional information for the next classifier in the cascade. Unlike voting or stacking ensembles, which are multi-expert systems, cascading is a multistage one.”
The name of the technology gives us a clear understanding of how it works. Cascading classification is like a recursive search of required feature within a single frame. Example: the human face is comprised of elementary geometrical shapes which could be described using an XML file. Every graphic has an abstract geometrical hierarchy. Painters are using this technique to train their portrait skills. Basically, we decide the centre of an object and draw a bounding oval. Eye position, nose … lips and ears…every next node placed on the basis of the previous one. Move from general to clarifying to find a face on a single frame.
CASCADECLASSIFIER results from studies of artificial intelligence. Analyzing the data set and with the comparison, we get the classification object.
Face detection in OpenCV
string face_cascade_name = "/path/haarcascade_frontalface_alt.xml”;

  CascadeClassifier face_cascade;

      void detectAndDrawDetectedFace(Mat* frame)
      {
          std::vector faces;
          Mat frame_gray;

          //Convert to gray
          cv::cvtColor(image, frame_gray, COLOR_BGR2GRAY);
          equalizeHist(frame_gray, frame_gray);

          //Scale to improve performance
          resize(frame_gray, frame_gray, cv::Size(), scale, scale);

          // Detect faces
          face_cascade.detectMultiScale(frame_gray, faces, 1.1, 2, 0 | CASCADE_SCALE_IMAGE, Size(30, 30));

          //Scale face params to original image size
          float bSale = 1 / scale;

          for (auto const& face : faces){
              Point pt1(face.x * bSale, face.y * bSale); // Display detected faces on main window - live stream from camera
              Point pt2((face.x * bSale + face.height * bSale), (face.y * bSale + face.width * bSale));

              //Draw
              rectangle(image, pt1, pt2, Scalar(0, 255, 0), 2, 8, 0);
          }

          frame_gray.release();
      }
haarcascade_frontalface_alt.xml - combine human face data model feature.
Through the Network
The process of obtaining and processing is completed. Now it's time to pass it on to FFMPEG. Let's create an output stream.
We are familiar with cv::Mat frame. It is great for analysis but not for data transfer. It's time to use a codec - compression. First, you can define a difference between cv::mat frame and AVPicture pixels format. Yuv420p for AVPicture and BGR for cv::Mat. To achieve fast output we are packing stream via H.264 or MPEG-4 codec.
Go to our machine learning and AI case studies.
INIT Stream
WIKI: The Real Time Streaming Protocol (RTSP) is a network control protocol designed for use in entertainment and communications systems to control streaming media servers. The protocol is used for establishing and controlling media sessions between end points. Clients of media servers issue VCR-style commands, such as play, record and pause, to facilitate real-time control of the media streaming from the server to a client (Video On Demand) or from a client to the server (Voice Recording).
Initialize output stream. Define a codec. Setup the buffers. Setup the headers.
 /*****************  Init Stream  *****************/
  int init_stream()
  {
    int ret;
    /* Initialize libavcodec, and register all codecs and formats. */
    av_register_all();
    avformat_network_init();
    av_log_set_level(AV_LOG_DEBUG);

    /* allocate the output media context */
    avformat_alloc_output_context2(&oc, NULL, "rtsp", filename);

    if (!oc)
    {
      std::cout<<"Could not read output from file extension: using MPEG."<< std::endl;
      avformat_alloc_output_context2(&oc, NULL, "mpeg", filename);
    }

    if (!oc){
      std::cout<<"Failed to ini output context"<< std::endl;
      return FAILED_OUTPUT_INIT;
    }

    fmt = oc->oformat;

    if(!fmt)
    {
      std::cout<<"Error creating outformat\n"<< std::endl;
    }

    /* Add the audio and video streams using the default format codecs
     * and initialize the codecs. */

    video_st = NULL;

    fmt->video_codec = CODEC_ID;

    std::cout<< "Codec = " << avcodec_get_name(fmt->video_codec) <video_codec != AV_CODEC_ID_NONE)
    {
      video_st = add_stream(oc, &video_codec, fmt->video_codec);
    }

    /* Now that all the parameters are set, we can open the audio and
     * video codecs and allocate the necessary encode buffers. */
    if (video_st)
    {
      open_video(oc, video_codec, video_st);
    }

    av_dump_format(oc, 0, filename, 1);
    char errorBuff[80];

    if (!(fmt->flags & AVFMT_NOFILE))
    {
      ret = avio_open(&oc->pb, filename, AVIO_FLAG_WRITE);
      if (ret < 0)
      {
        std::cout
        << "Could not open outfile: " << filename << "\n"
        << "Error:  " << av_make_error_string(errorBuff,80,ret) << "\n"
        << endl;

        return FAILED_OUTPUT;
      }
    }

    std::cout
    << "Stream: " << filename << "\n"
    << "format:  " << oc->oformat->name << "\n"
    << "vcodec:  " << video_codec->name << "\n"
    << "size:    " << dst_width << 'x' << dst_height << "\n"
    << "fps:     " << av_q2d(dst_fps) << "\n"
    << "pixfmt:  " << av_get_pix_fmt_name(video_st->codec->pix_fmt) << "\n"
    << endl;

    ret = avformat_write_header(oc, NULL);

    if (ret < 0)
    {
      std::cout
      << "Error occurred when writing header: " << av_make_error_string(errorBuff,80,ret) << "\n"
      << endl;

      return FAILED_OUTPUT_HEADER;
    }

    return 0;
  }
Configure a codec
 /*********************** CONFIGURE OUTPUT STREAM ************************/
  AVStream *add_stream(AVFormatContext *oc, AVCodec **codec, enum AVCodecID codec_id)
  {
    AVCodecContext *c;
    AVStream *st;

    /* find the encoder */
    *codec = avcodec_find_encoder(codec_id);

    if (!(*codec))
    {
      std::cout << "Could not find encoder for" << avcodec_get_name(codec_id) << std::endl;
      exit(1);
    }

    st = avformat_new_stream(oc, *codec);

    if (!st)
    {
      std::cout << "Could not allocate stream" << std::endl;
      exit(1);
    }

    st->id = oc->nb_streams-1;
    c = st->codec;

    c->codec_id = codec_id;
    c->bit_rate = 800000;
    /* Resolution must be a multiple of two. */
    c->width    = dst_width;
    c->height   = dst_height;
    /* timebase: This is the fundamental unit of time (in seconds) in terms
     * of which frame timestamps are represented. For fixed-fps content,
     * timebase should be 1/framerate and timestamp increments should be
     * identical to 1. */
    c->time_base.den = STREAM_FRAME_RATE;
    c->time_base.num = 1;
    c->gop_size      = 12; /* emit one intra frame every twelve frames at most */
    c->pix_fmt       = STREAM_PIX_FMT;

    if (c->codec_id == AV_CODEC_ID_MPEG2VIDEO)
    {
      /* just for testing, we also add B frames */
      c->max_b_frames = 2;
    }

    if (c->codec_id == AV_CODEC_ID_MPEG1VIDEO)
    {
      /* Needed to avoid using macroblocks in which some coeffs overflow.
       * This does not happen with normal video, it just happens here as
       * the motion of the chroma plane does not match the luma plane. */
      c->mb_decision = 2;
    }

    /* Some formats want stream headers to be separate. */
    if (oc->oformat->flags & AVFMT_GLOBALHEADER)
    {
      c->flags |= CODEC_FLAG_GLOBAL_HEADER;
    }

    return st;
  }
Connection config. Compression level, quality of the stream
/*********************** OPEN OUTPUT CONNECTION ************************/

  void open_video(AVFormatContext *oc, AVCodec *codec, AVStream *st)
  {
    int ret;
    AVCodecContext *c = st->codec;

    /* open the codec */
    AVDictionary *opts = NULL;

    /*
     Change options to trade off compression efficiency against encoding speed.
     If you specify a preset, the changes it makes will be applied before all other parameters are applied.
     You should generally set this option to the slowest you can bear.
     Values available: ultrafast, superfast, veryfast, faster, fast, medium, slow, slower, veryslow, placebo.
     */
    av_dict_set(&opts, "preset", "superfast", 0);
    /*
     Tune options to further optimize them for your input content. If you specify a tuning,
     the changes will be applied after --preset but before all other parameters.
     If your source content matches one of the available tunings you can use this, otherwise leave unset.
     Values available: film, animation, grain, stillimage, psnr, ssim, fastdecode, zerolatency.
     */
    av_dict_set(&opts, "tune", "zerolatency", 0);

    /* open the codec */
    ret = avcodec_open2(c, codec, &opts);

    if (ret < 0)
    {
      std::cout << "Could not open video codec" << std::endl;
      exit(1);
    }

    /* allocate and init a re-usable frame */
    frame = av_frame_alloc();
    pFrameBGR =av_frame_alloc();

    if (!frame)
    {
      std::cout << "Could not allocate video frame" << std::endl;
      exit(1);
    }

    frame->format = c->pix_fmt;
    frame->width = c->width;
    frame->height = c->height;
  }
Prepare cv::Mat frame to write. Use Software scaling context (SwsContext) to create AVPicture from cv::Mat.
/***************** WRITE VIDEO FRAMES  *****************/

  void write_video_frame(AVFormatContext *oc, AVStream *st, int play)
  {
    int ret;
    AVCodecContext *c = st->codec;

    int numBytesYUV = av_image_get_buffer_size(STREAM_PIX_FMT, dst_width,dst_height,1);

    if(!bufferYUV)
    {
      bufferYUV = (uint8_t *)av_malloc(numBytesYUV*sizeof(uint8_t));
    }

    /* Assign image buffers */
    avpicture_fill((AVPicture *)pFrameBGR, image.data, AV_PIX_FMT_BGR24,
                   dst_width, dst_height);

    avpicture_fill((AVPicture *)frame, bufferYUV, STREAM_PIX_FMT, dst_width, dst_height);

    if (!sws_ctx)
    {
      /* Initialise Software scaling context */
      sws_ctx = sws_getContext(dst_width,
                               dst_height,
                               AV_PIX_FMT_BGR24,
                               dst_width,
                               dst_height,
                               STREAM_PIX_FMT,
                               SWS_BILINEAR,
                               NULL,
                               NULL,
                               NULL
                               );
    }

    /* Convert the image from its BGR to YUV */
    sws_scale(sws_ctx, (uint8_t const * const *)pFrameBGR->data,
              pFrameBGR->linesize, 0, dst_height,
              frame->data, frame->linesize);

    AVPacket pkt = { 0 };
    int got_packet;
    av_init_packet(&pkt);

    /* encode the image */
    frame->pts = frame_count;
    ret = avcodec_encode_video2(c, &pkt, play ? NULL : frame, &got_packet);

    if (ret < 0)
    {
      std::cout << "Error while encoding video frame" << std::endl;
      exit(1);
    }
    /* If size is zero, it means the image was buffered. */

    if (got_packet)
    {
      ret = write_frame(oc, &c->time_base, st, &pkt);
    }
    else
    {
      if (play)
        video_is_eof = 1;
      ret = 0;
    }

    if (ret < 0)
    {
      std::cout << "Error while writing video frame" << std::endl;
      exit(1);
    }

    frame_count++;
  }
Write each single frame.
 int write_frame(AVFormatContext *fmt_ctx, const AVRational *time_base, AVStream *st, AVPacket *pkt)
    {
        /* rescale output packet timestamp values from codec to stream timebase */
        pkt->pts = av_rescale_q_rnd(pkt->pts, *time_base, st->time_base, AVRounding(AV_ROUND_NEAR_INF|AV_ROUND_PASS_MINMAX));
        pkt->dts = av_rescale_q_rnd(pkt->dts, *time_base, st->time_base, AVRounding(AV_ROUND_NEAR_INF|AV_ROUND_PASS_MINMAX));
        pkt->duration = av_rescale_q(pkt->duration, *time_base, st->time_base);
        pkt->stream_index = st->index;

        /* Write the compressed frame to the media file. */
        return av_interleaved_write_frame(fmt_ctx, pkt);
    }
Conclusion
FFMpeg and OpenCV are the force in media content manipulation. Low level of the (C/C++) tools allows us to analyze videos in a real-time. It actually looks like magic - all details within.
Hope you have found this article useful, don't forget to leave your comments below the article. If you have a project idea in mind but don't know where to start, we're always here to help you.